15 December 1899
A guided battlefield walk with James Seymour
On 15 December 1899, British and Boer forces fought at Colenso during the British attempt to relieve the besieged garrison at Ladysmith.
Lieutenant-General Sir Redvers Buller commanded the British force in Natal. The Boer defence of the Tugela was commanded by General Louis Botha.
The British plan was to cross the Tugela at several points and advance towards Ladysmith. The attack failed, and the British withdrew with heavy casualties.
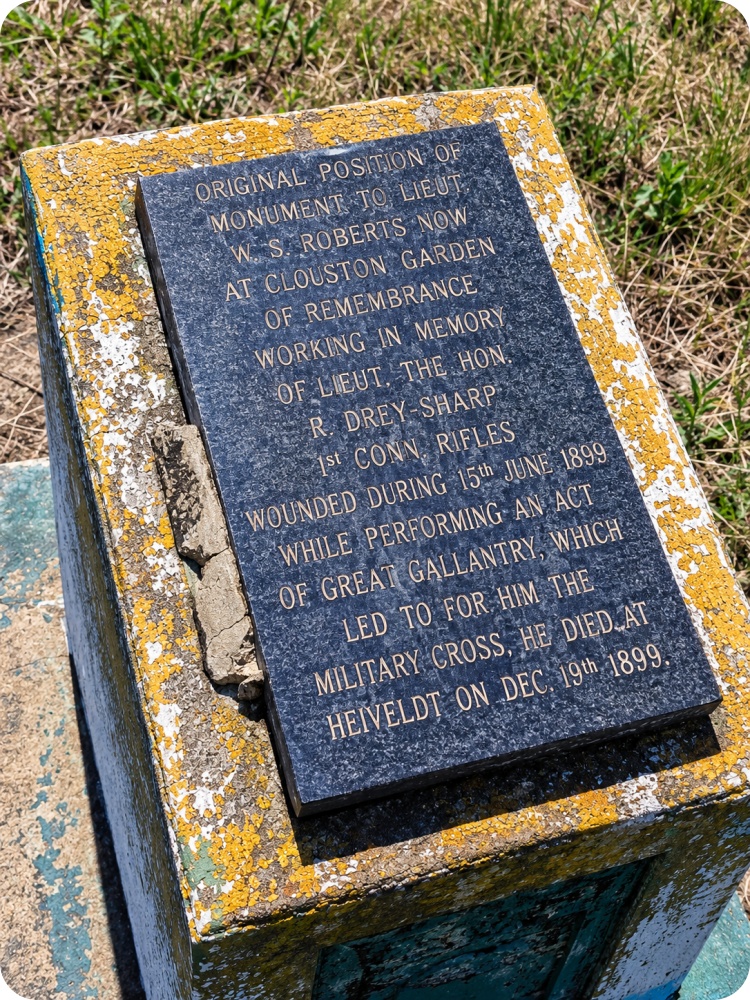
You can still follow the battlefield through the positions, routes, and features that shaped the fighting.
Drakensberg Walking Experiences offers a guided walk of the Colenso battlefield with James Seymour, a registered KwaZulu-Natal Battlefields, Adventure, Nature and Culture guide.
The tour includes Chieveley, Clouston Koppie and the Gun Site at Colenso.
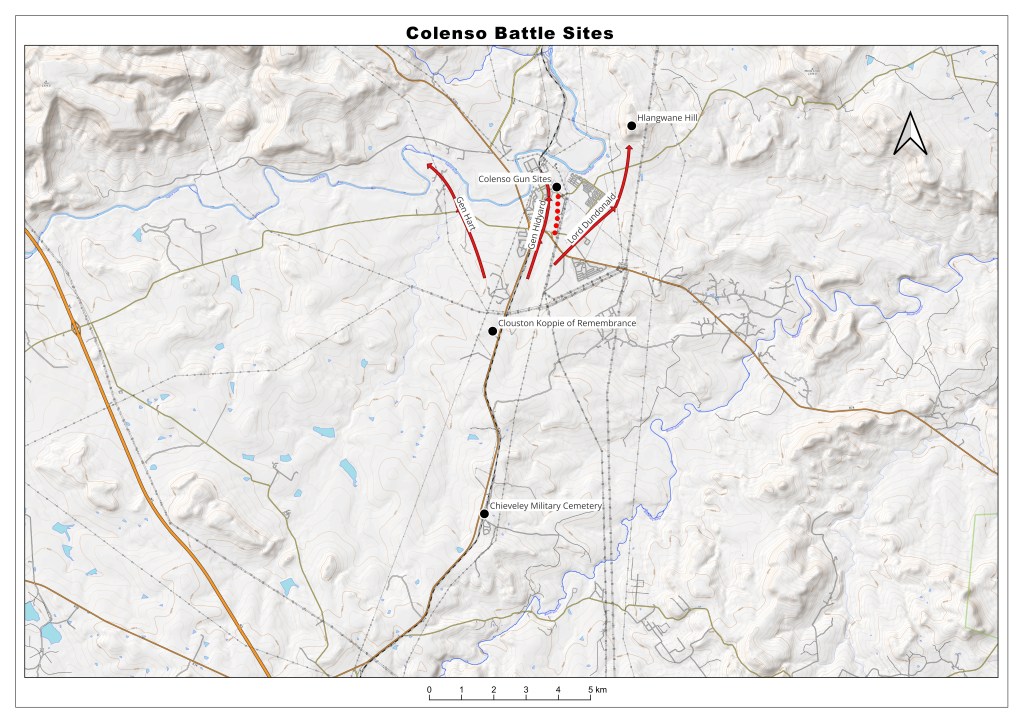
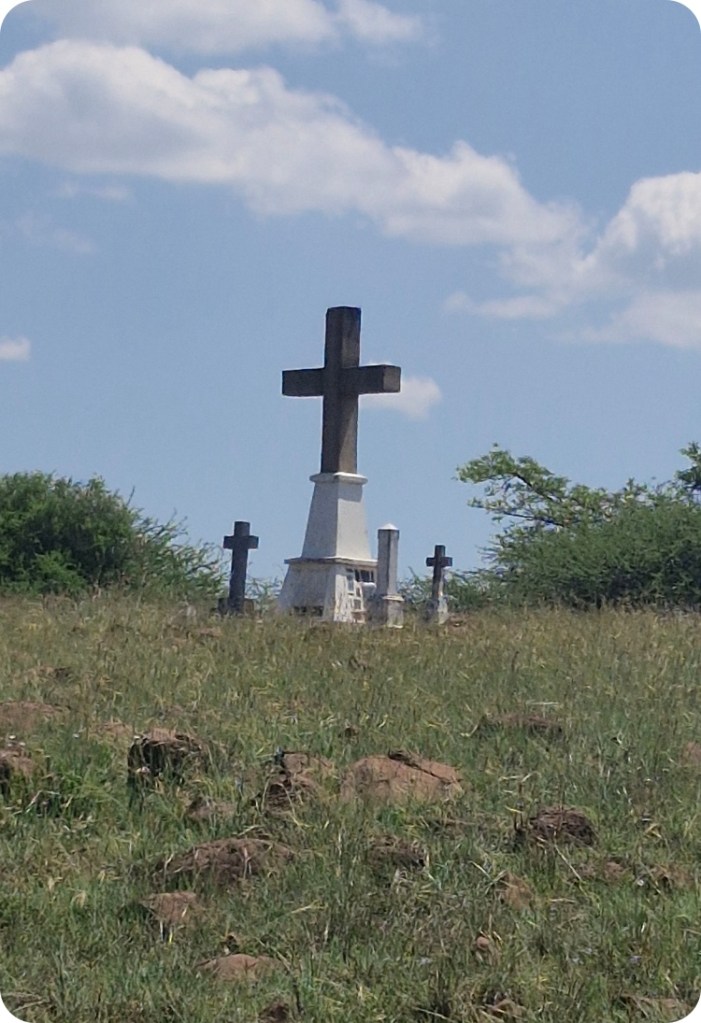
Colenso, 15 December 1899
Buller planned to cross the Tugela at several points.
the British infantry advance was broadly:
– Hart’s 5th Brigade — towards the Bridle Drift on the British left.
– Lyttelton’s 4th Brigade — in support of Hart and Hildyard.
– Hildyard’s 2nd Brigade — towards Colenso and the railway bridge.
– Barton’s 6th (Fusilier) Brigade — on Hildyard’s right/east, in general support.
– Dundonald’s mounted troops — on the extreme right, with the important objective of Hlangwane Hill.
The Boer positions were spread along the Tugela and on the surrounding rises. Many were concealed from the advancing British troops.
The British attack soon ran into difficulties. Hart’s brigade was recalled. Hildyard’s troops reached Colenso but could not continue their advance. British artillery came under heavy fire.
The withdrawal that followed included one of the best-known incidents of the battle: the attempts to recover the guns of the 14th and 66th Batteries, Royal Field Artillery.
The Commanders
Sir Redvers Buller
British Commander in Natal
Buller had been sent to South Africa to command the British forces in Natal and relieve Ladysmith.
At Colenso he directed the attempt to cross the Tugela. Once it became clear that the attack could not succeed, he ordered the withdrawal.
The failure at Colenso led Buller to reconsider how to cross the Tugela. His subsequent operations produced the battles that became known as the Tugela Heights campaign.
Louis Botha
Boer Commander at Colenso
Louis Botha commanded the Boer forces defending the Tugela.
He understood the ground well and made effective use of concealed positions along the river and surrounding hills.
The Boer defence prevented Buller’s army from establishing a crossing and forced the British to withdraw.
Major-General Arthur Hildyard
Commander of the 2nd Brigade
Hildyard’s brigade advanced towards Colenso.
His troops entered the village and came under fire from Boer positions. The advance could not continue, and the brigade later helped cover the British withdrawal.
Major-General Fitzroy Hart
Commander of the 5th Brigade
Hart’s brigade was sent towards Bridle Drift, west of Colenso.
The advance became confused as the brigade approached the Tugela. Buller recalled Hart before the brigade could establish the intended crossing.
Major-General Neville Lyttelton
Commander of the 4th Brigade
Lyttelton’s brigade advanced between Hart’s brigade and Hildyard’s brigade.
Its role was to support either the attack towards the Bridle Drift or Hildyard’s advance on Colenso, depending on where it was most needed.
When Hart’s attack became trapped in the Tugela loop, Buller ordered Lyttelton to assist in extricating the 5th Brigade. Two of Lyttelton’s battalions were subsequently sent forward to support Hart’s withdrawal.
Major-General Geoffrey Barton
Commander of the 6th Brigade
Barton’s brigade advanced on the eastern side of the railway, protecting the right flank of Hildyard’s brigade.
Its orders were to support Hildyard if required and, if necessary, to assist the mounted troops operating towards Hlangwane Hill.
As the battle developed, Barton’s brigade became involved in the fighting on the British right, advancing across open ground broken by dongas. The brigade was eventually withdrawn towards midday, returning to camp during the afternoon.
Colonel Charles James Long
Royal Field Artillery
Colonel Long commanded the 14th and 66th Batteries, Royal Field Artillery.
The batteries were brought forward to support the British infantry. However, they did so too enthusiastically, and reportedly advanced ahead of the infantry.
When the artillery detachments came under heavy fire, they could not withdraw all the guns. They made several attempts to recover them.
Those attempts resulted in six Victoria Crosses.
The Guns
The gun episode is one of the most detailed parts of the Colenso story.
Twelve field guns of the 14th and 66th Batteries were taken forward. When the British infantry advance failed, the guns were left exposed.
Men went forward under fire to bring them back.
Only two of the twelve guns were recovered.
Six Victoria Crosses were awarded for actions connected with attempts to recover the guns. Major William Babtie of the Royal Army Medical Corps received a seventh Victoria Cross for his work among the wounded.
The Victoria Crosses
Captain Walter Norris Congreve VC
Rifle Brigade
Congreve took part in the attempts to recover the guns.
After being wounded, he returned to assist Lieutenant Frederick Roberts, who had also been wounded. Congreve helped bring Roberts back from the exposed ground.
Captain Harry Norton Schofield VC
Royal Field Artillery
Schofield went forward during the first attempt to recover the guns.
He assisted in bringing two guns back under heavy fire.
Captain Hamilton Lyster Reed VC
Royal Field Artillery
Reed brought teams forward in another attempt to recover the guns.
The party came under heavy fire. Reed was wounded, and his horse was killed. One man was killed and five were wounded.
The attempt was abandoned.
Lieutenant the Hon. Frederick Hugh Sherston Roberts VC
King’s Royal Rifle Corps
Lieutenant Roberts volunteered to help recover the guns.
He was severely wounded and died from his wounds two days later.
His Victoria Cross was awarded posthumously.
Corporal George Edward Nurse VC
66th Battery, Royal Field Artillery
Nurse went forward under fire to help the men recover the guns.
He took part in the successful effort to limber up one of the guns that was brought away.
Private Charles Ravenhill VC
2nd Battalion, Royal Scots Fusiliers
Ravenhill repeatedly went forward under fire to assist in the recovery attempts.
He helped to limber up one of the guns that was successfully withdrawn.
Major William Babtie VC
Royal Army Medical Corps
Babtie was awarded the Victoria Cross for tending wounded men under heavy fire.
Wounded artillerymen were lying in an exposed donga. Babtie rode forward to attend to them. His pony was hit three times.
He later went forward with Captain Congreve to help bring Lieutenant Roberts back.
Chieveley
The walk begins at Chieveley, where James introduces the campaign in Natal and the British attempt to relieve Ladysmith.
The area provides a useful starting point for following the British advance towards the Tugela and understanding the distances involved.
Maps help identify the routes followed by British forces and the positions occupied before the attack.
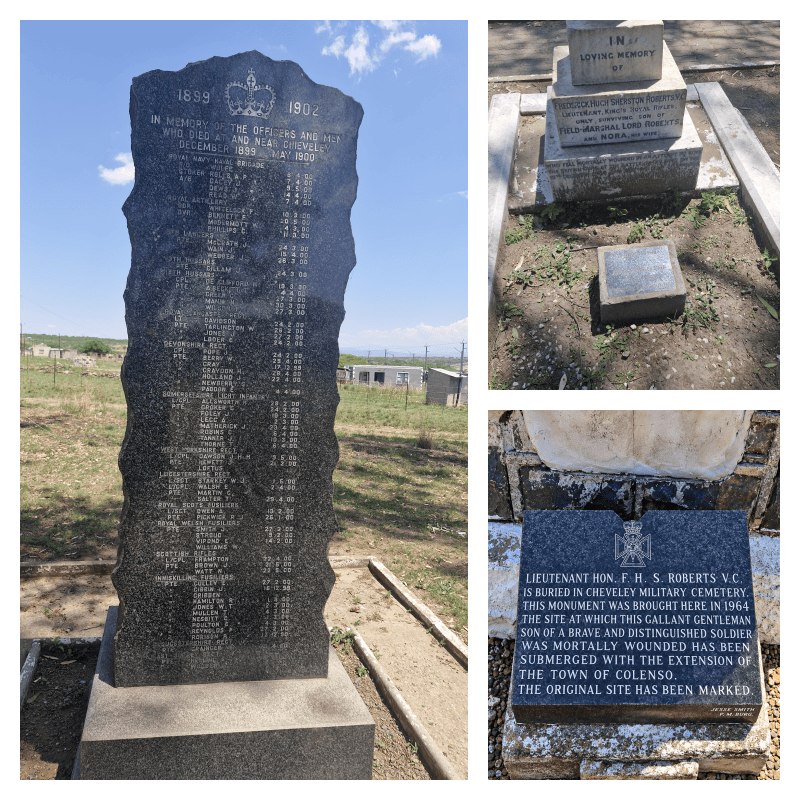
Clouston Koppie
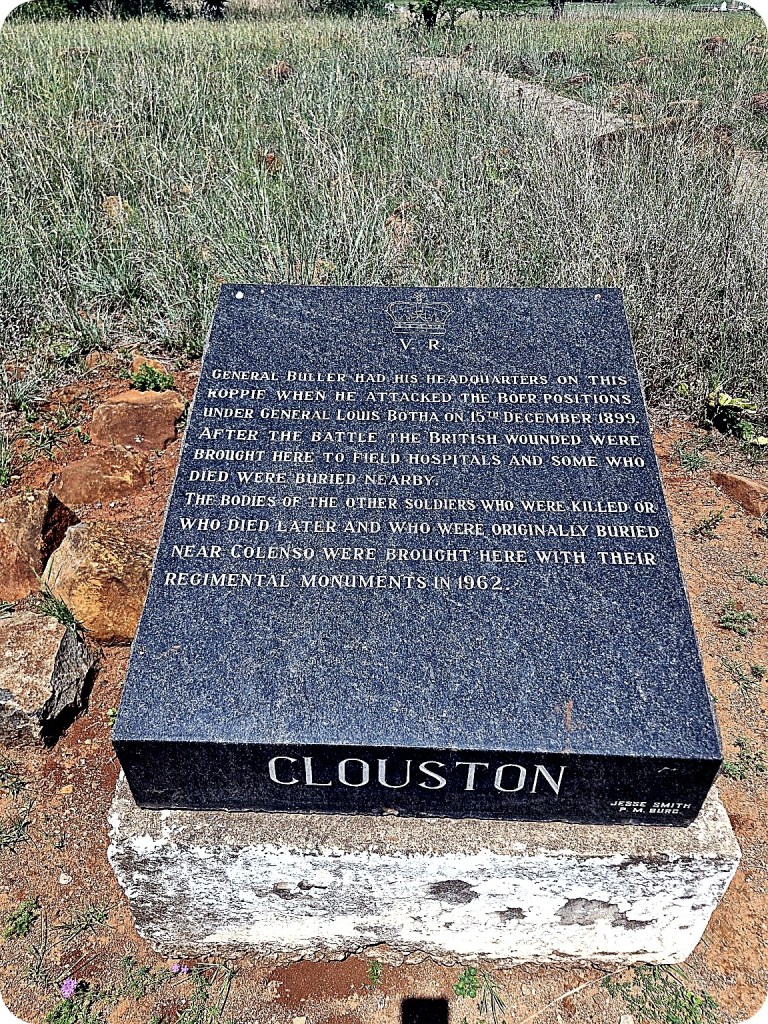
The walk continues to Clouston Koppie.
From here, you can examine the surrounding ground in relation to the British advance and the Boer defensive positions.
James explains the movements of the opposing forces and the way the terrain affected their deployment.
The Gun Site at Colenso
The final part of the walk is at the Gun Site at Colenso.
Here, you can follow the events surrounding the abandoned artillery on the ground.
The distance between the guns, the donga and the British positions helps to explain the difficulty faced by the men who attempted to recover the artillery under fire.
The six men who received the Victoria Cross for their actions in the gun episode were:
Captain Walter Norris Congreve
Captain Harry Norton Schofield
Captain Hamilton Lyster Reed
Lieutenant Frederick Hugh Sherston Roberts
Corporal George Edward Nurse
Private Charles Ravenhill
Major William Babtie received the Victoria Cross for tending the wounded.
The Walk
The Colenso battlefield is best approached with the maps and accounts of the battle alongside the ground itself.
James follows the events of 15 December 1899 through the locations visited during the walk, explaining the movements of the British and Boer forces and the actions of the men involved.
The emphasis is on the military history of Colenso and on seeing the positions and routes for yourself.
Your Guide
James Seymour is a registered KwaZulu-Natal Battlefields, Adventure, Nature and Culture Guide.
He leads battlefield walks that combine historical research with visits to the locations where the events occurred.
At Colenso, the walk concentrates on the battle of 15 December 1899, the commanders on both sides, the fighting around the Tugela and the story of the guns and the Victoria Crosses.
Battle of Colenso Walking Experience
15 December 1899
With James Seymour
Registered KwaZulu-Natal Battlefields, Adventure, Nature and Culture Guide
Tour includes:
- Chieveley
- Clouston Koppie
- Gun Site at Colenso
Private tours and group bookings available.
For enquiries and bookings, contact Drakensberg Walking Experiences.

